Acer Aspire 7741

A while back I saw a listing for batches of laptops being sold from a computer recycler. These machines were being sold as “we don’t know if they work, they’re not what we usually sell, but you’re welcome to try to fix them”. So I thought to keep up my repair skill and to have a test laptop or two I would pick up a batch and give it a try. Couple odd days later I received the lot and most of them were just generic consumer ultra basic laptops and most of them, surprisingly, powered right up without an issue.

Most of the machines were low end consumer laptops with not much noteworthy; under-powered CPU’s, barely enough memory, mechanical hard drives, all wrapped up in a “budget friendly” package. Having the wind knocked out of sails of my epic test lab dreams (not sure what I was expecting out of the lot anyway) I decided to pivot my plans slightly. In October of 2025 Microsoft will be cutting off Windows 10, meaning that whole lot of machines just like these that I bought will be effectively eWaste and thrown in the trash. So I decided to amend my testing plans just slightly to find out if these machine would still be usable for most things … just without Windows.

I pulled out the first laptop an Acer Aspire 7741, it was not spectacular with an Intel Pentium P6000 processor (2 core 1.87ghz) and 6 gigs of RAM. To establish some kind of number that I could use to give others an IDEA of what the machine performed like (that is they could run the same tool on their own computer to get a number that could be compared to get a feel of better or worse) I would use GeekBench. (Note: this is not an endorsement for one tool or another, just the tool that I thought would be usable on the most platforms and be reasonably priced.)

To get started, I had installed a 120GB SSD to the machine and install Linux Mint and then ran a performance scan.

Single-Core : 273
Multi-Core : 481
Not terribly great …

The results were not the most remarkable numbers ever, but the machine was definitely usable. I thought that numbers alone really did not mean a whole lot, so I would throw some things at it and see how the machine did.

Youtube Lofi
Plays some Youtube LoFi
Amazon Screenshot
I can search for more powerful laptops on Amazon
Steam Screenshot
How about Steam??
Screenshot from AdVenture Capitalist - a clicker game
AdVenture Capitalist works!

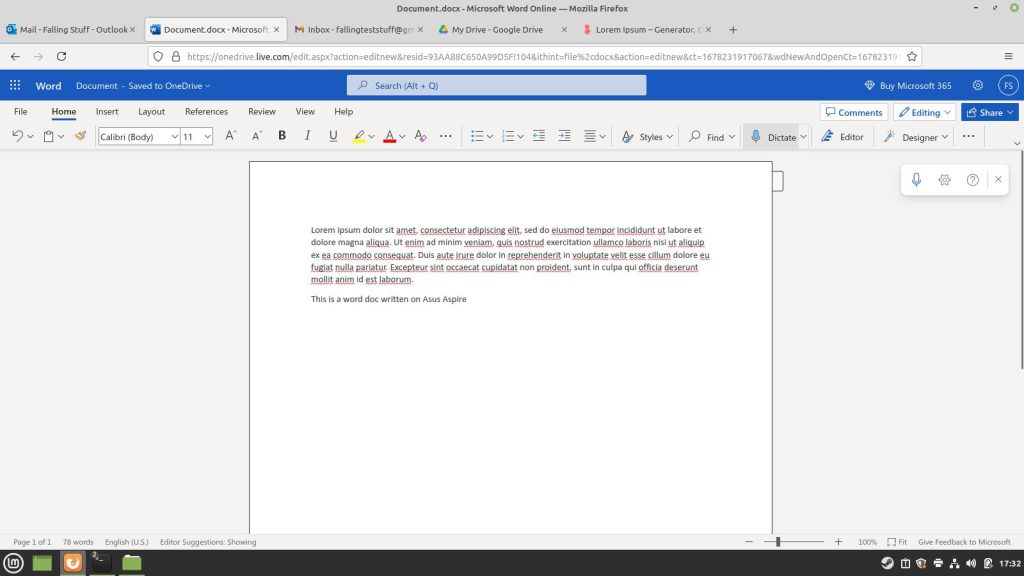
I could search on the web, watch Youtube, and play a simple clicker game … But could I do anything useful?

Google Doc
OneDrive doc in progress
Doc in OneDrive too
Screenshot of google doc in progress
And LibreOffice

So, it would not win any awards, but this Acer Aspire 7741 was not eWaste and was very usable based on the tests I threw at it. I enjoyed this first test and think I will write more of these, help in my small way to show that someone does not need the latest and greatest machine just to get on the internet and do basic things. Ultimately I will toss this machine on eBay, and I need a better testing process moving forward …

A Browser Based Laptop!?

Back in 2011 Google announced this interesting compute device, a Chromebook, basically a laptop that ran Chrome and Chrome alone. Out of the gate, I thought this was the most pointless idea I had heard of and, at the time, I thought I was justified in that thought. I mean, this was a device with a low power Atom processor who’s purpose was to go on web pages … Com’on, that is what I have a browser on my computer for.

Fast forward a few years and something interesting happened, Android apps on Chrome OS. Now, I am still not drinking the Kool-Aid here, but that device that was could just look at web pages can now use mobile apps, now that might be useful. Turns out a laptop that is just a browser can actually be useful.

Asus C300M

I had one of these little Asus C300M appear in a batch of “broken” machines that I purchased to repair and sell. At the time I did not even consider taking pictures of the damage – the battery was removed and the screen cracked. Of course … the previous owner left their account on it *ugh*.

While I am not going to be ditching my laptop anytime soon, this is an opportunity that I could not pass up and see if I was right way back when these hit the market. The machine was simple to fix, as everything is on a single main board, with memory and storage soldered to the board as expected. A couple of (pricey) replacement parts and quick reset to factory settings later and I have a Chromebook (Pre-Android).

Being essentially a laptop Chrome browser, the first place to start the test drive is definitely web pages. The desktop itself has a task bar at the bottom with the rest of the apps opening up in a menu more Android style. The cool part that I appreciated is that Chrome extensions are supported, meaning that if you have something like an ad blocker or password manager, they are likely to be available on the Chrome book (even one as old as this).

Showing off the apps

Lots of apps to choose from
then there is always Google
and yes, YouTube

Ok, so the web thing works, that is a good start but what about email? There is a Gmail icon, how does that work? Not quite the way I had hoped, but not terribly bad either.

the icon opens Gmail

So the machine does web, not completely useless and the user experience is more or less seamless. Click on and icon and it does something and simply, just opens. This left me with really only a question of files – what of downloads, PDF’s, Google drive, pictures!

downloads saved to the local device
PDF viewed in Chrome
Google drive? No problem.
how about those pictures
you can plug in USB drives too

This is far from a comprehensive review of a Chromebook, this particular type (the Pre-Android version) is getting older and is not receiving updates anymore. Getting a chance to actually try out this device changed my mind about it being completely pointless… I mean it is still a browser based laptop and I do not plan of giving up my laptop any time soon, but as a device for just casual web surfing or having reference materials on while working on some project – without the fear of damaging an expensive machine should something happen to it – not a bad idea.

Silver Mystery Box

I am at my local thrift store not long ago and was walking down in the electronics section when I notice this silver box sitting on the shelf. Now I recognize the shape of this box, looks a lot like the size and dimensions of an external hard drive. Now, I am the curious type and could not pass up the opportunity to see what might have been left behind, also for about $5.00 including the power supply – I can think of worse ways to spend a curious weekend.

Getting the drive home I break out the USB write blocker and Kali laptop – way nerdy, yes… but just in case there might be something ugly living on the drive… I get everything connected, hit the switch on the box and the lights come on, good sign, but I do not see the drive showing up on the laptop. Ok, so maybe the write blocker is causing an issue and keeping the drive from showing up. I remove the blocker and connect the silver box directly and .. nope. I can see the enclosure if I run an lsusb command (to list USB devices), but anywhere else.

So then (while not a good idea) I decide I will take the chance and plug the box into a windows computer. Again, nothing – I can hear the USB being detected but the drive will not connect. Checking disk management I see the drive!

When I try to initialize it … Fail.

Grabbing a screwdriver I pop the enclosure open and pull the hard drive out. Connecting it up with a hard drive dock and the Kali machine and … the drive is there … Twice or, 2 partitions. One partition is blank, the other has someone’s downloaded audio books – complete with the torrent files from the download.

The mystery of the silver box is solved! A portable hard drive that someone was using for downloading audio books. The trouble with reading the drive in the enclosure turned out to be components failing in the enclosure (probably why it ended up at a thrift store) but a working SATA hard drive – I am not not much of a fan of the audio book titles, so the drive got a good cleaning before a final destination in the parts bin.

Washing the Chromebook

Back a while back I posted up a brief run down on an Asus Chromebook that happened to be in a stack of “broken” laptops I purchased. When I received it, the Chromebook had a cracked screen and was locked by the previous owner. As I was still new to the idea of a Chromebook (and did not want to try and hack into the thing) I went looking for some kind of option to wipe out the already existing stuff without needing a user password; sort of like the reset function in Windows. To my relief (and surprise) this reset existed as a function called “Powerwash” … a fancy name for a Factory Reset.

For this post I am not going to dive into the how-to of the process; the Chromebook I have is fairly old, the OS is no longer supported, and how-to is not the purpose of what I am testing here. As a reference or if someone those curious, the documentation is located here. The real reason for writing this was really just to see how much if a wash actually removed all the personal data off the machine.

The original plan was originally concocted back just after I finished up the course on using Autopsy forensics software back in around 2019 (see what I meant about backlog piling up …). Autopsy does not have a way .. natively .. to gather info from Chromebook – the machine runs completely off soldered on storage, so off to find another way to grab the info. A quick search later and I stumbled onto Magnet Forensics, it was free and looked simple enough to do what I was needing.

Basically, following the instructions would put the machine into a “recovery state” then this tool, housed on a USB drive, would come in and grab up all the data and drop it onto a part of USB that could be read from another computer. Simple enough. I browsed a few sites, downloaded a few files, and edited a few things on the Chromebook then followed the steps in the documentation. The trickiest part was getting the Chromebook into recovery mode, done by a key combination that has to be pressed at just the right time. After running the tool the first time, I ran the powerwash recovery on the Chromebook and then ran the recovery tool again, using a second USB drive.

Once I copied off the recovered data, it was pretty obvious that data was cleaned in the process seeing as the file with data (pre-clean) was 411MB and after clean was 7KB. Seeing this difference I thought I would just expand these compressed files and compare the results .. no need to go much father than a folder comparison.

Before cleaning / After cleaning
Before cleaning / After cleaning with more files
Downloads before / After cleaning

So, nothing more to say .. Powerwash cleaned up the user data .. at least enough that the casual buyer would not be able to get data off the machine if someone were to sell it later.

DAK Organization

Several odd years ago I saw this really cool calendar / to-do monitor in a YouTube video that the person in the video said was from a company called DAKboard. When I found out one of these boards could be built with a Raspberry Pi, I started building. I have had the board hanging up on the wall for several years now, trying to keep up the need to do things.

DAKboard itself is, at the core, an online service thing, it has different levels of features based on subscription levels – the higher the level the more customizations and displays one can run from the same account. DAKboard also sells custom hardware in both a full display or just the brains to connect to any sort of TV or monitor that one has gathering dust in a corner (or a webpage … or a tablet…) . However they offer a DIY guide to setting up a board using a Raspberry Pi, which is what I set up some time ago.

I am going to skip the technical details of setting the display up, as it is largely personal preference on how one wants their board to display (plus there is that whole subscription thing…). I have mine set up with Google and Outlook calendars and tasks from Todoist, along with my local weather. I occasionally run into something I cannot do (say limited number of calendars) here and there but for the most part, I am not feeling too limited with a free account. Definitely worth a look if one is looking for a tool to help wrangle in tasks.

Stale Chips

Like a lot of people, one of my goals for this year is to reorganize and clean up, my backlog keeps getting derailed every time I go looking for parts in my current storage… During my cleaning I stumbled across these two CHIP single board computers. They both powered up, but one never displayed anything on the screen … So, time for an update…?

I jumped on the original Kickstarter back in 2016 when these were first released for only $9 each. I do not remember where I originally heard about it, but I remember being excited to jump on such a neat concept and all the tinkering that would be had. Doing a quick search back at the news of the time, the CHIP was being really well received with a good amount of chatter around it – USA Today and NPR ran excited stories on the CHIP.

Seeing as how I can post pictures of these CHIPs I definitely received the Kickstarter reward, but in researching I see that a lot of people did not, it was disappointing to see that a lot of people did not. The reason for this lack of delivery was apparently that the company, Next Thing Co., was not entirely able to continue product and went bankrupt. With the company going bankrupt that unfortunately means support is, well almost non-existent, aside from dedicated folks keeping these little things alive and mostly supported …

Originally, the CHIP was flashed by a Chrome plugin, support for which Google has LONG since killed off in the Chrome browser so the first challenge was to get these chips back in working order. Thankfully with some quick googling I was able to put together enough steps to flash both CHIPS between the Flash-Chip Git hub and the JFPossibilites archives of CHIP materials. Even with the instructions from these sites I still ran into issues with the process, needing an older version of Linux and an even older version of software to finish the flash (this was just my experience though), but after a couple hours of tinkering …

Ta-Da! Success, a CHIP desktop! Turns out these little guys still work after all these years and being moved from place to place in storage, I am a little excited.

This image even had the original software that came on the CHIP from the factory …

Including the original 4.4.13 kernel from 2016 .. ouch (as of this writing, the current Linux kernel is 6.7.1). At this point attempting an Apt update returns a lot of 404’s and site not found since CHIP OS was based of Debian Jessie and long term support ended in 2020 and the repositories for Next Thing Co are also no longer a thing. At this point, these CHIPs are looking very stale and much like eWaste. These are a cool idea, but methods to support them make life difficult.

So, what now? Well, for the moment this is where the CHIPs get put back into storage. There are sites to work around the dead repositories and get some updates onto these mini computers (I would be lying if I said I did not try already), but to what level of update? Updating them to that degree was out of scope for this post – I was just out to write about a neat Single Board Computer – also, I do not have any good projects for them at the moment. They are capable little SBCs, so I think I will be revisiting them sometime in the future, until then, they are just a little stale.

New PC, Who Dis?

“New Phone, Who Dis?” famous words said countless times to any number of people days, weeks, and even months after replacing a mobile phone. The strange “Who Dis?” dance goes on when we get a new computer too, though the moves are a little different. Worse, the steps of the dance especially when the computer is not exactly Brand New and the previous owner left their grubby fingerprints all over.

I have had some luck in the past 18 months or so finding really interesting computers at thrift stores and in ‘lots’ of “junk” computers from various online sellers. One of these so-called “junk” laptops happened to be this little Asus EEE PC pictured below. By today’s standards, the EEE PC no where NEAR anything to write home about, but back in the day this little brick was a pioneer, kicking off the ‘Netbook’ style of computers (outside Japan).

Of course, when the machine arrived the battery was completely drained and there was no power supply included – but a quick once over and the machine looked to be in working order. A power supply was quickly sourced and once power was applied, the laptop bounced back to life, and started Windows.

Awesome, already loaded with Windows 7. Since this machine was part of a lot of machines I really did not need anyway, seeing this I am about ready to get this little laptop ready to throw onto eBay. Until …

Oh. Well. A password prompt, lovely. It is at this moment of our story that I need to make a point or three. First, the powers I am about to demonstrate can be used for good or evil, and while this really is not a sophisticated trick – Do. No. Evil. with what you may learn. Second, I feel comfortable sharing these screen shots as there honestly not enough information here to identify the previous owner OR anything personally identifiable (aside from a name and a few internet favorites, random files, et cetera). Third, the point I am aiming for is that – before you donate a computer to your local charity, erase your stuff…

Now, seeing a password prompt I can easily just erase the drive and reuse the computer, but I simply cannot pass up the opportunity to see what a computer was used for in a past life. Cracking the password just is not worth the time as the machine is now mine and seeing Windows 7 Starter is installed, it is not encrypted. At this point, I reach for a trusty USB drive with a Live Ubuntu image and booted right up to the drive, and I am around the password.

Now with the password problem sorted, time to check the hard drive. The first observation is that this drive was spilt into 2 volumes (something like an OS partition and a Data partition). Starting with the partition with Windows on it, the folder layout on the drive drive looks very much like a Windows 7 Installation would. This means that if there is anything obvious to be found, the Users folder is where to begin.

With just a few clicks we find ourselves in the previous owner’s user profile (Jon) and can now see what was left behind, aside from a password that is.

Not much music to listen to …
At least it has virus protection, or well there was an attempt …
Someone was saving some links to fix their computers …
Lots of audio shortcuts on the desktop …
But no pictures to speak of …
Onto the second partition … and not much here either (just Windows created folders) …

There was not much to speak of on this machine, only a few bit and crumbs left behind. Although, the more technical readers will be quick to point out that I did not look for internet cookies, internet cache, or temporary files and they would be correct. Finding all the crumbs to build a profile on a particular user was not the point of this exercise … The point of this exercise was to point out how simple it was to get the data off the machine even though a password was in place. No fancy or complicated tricks were used, just a bit of time and patience and then I could see anything left behind.

Of course I should not have to say this again, but this was a machine I purchased second hand from a thrift store and the drive was securely wiped after writing this. A method like this should not be used to bypass any sort of security on devices that you do not own … and, in conclusion, for the love of all that is holy … Erase your stuff BEFORE selling or donating them!

Diskpart – How Clean is Clean?

BEFORE selling or throwing away a machine I cleaned the drive.

Building onto Parting the Disk we can see how DiskPart might be applied to clean up drives BEFORE selling or throwing away a machine. I did not have a machine convenient to test the cleaning of drives, but I DID have a Windows 10 Install USB, so that will have to do for the purposes of this test…

First, looking at the drive in explorer there are files present. I am going to skip the highly technical part where ‘files in explorer we see are pointers to the actually data” in favor of “deleting the picture does not make the file disappear completely. To prove that the files are not actually removed, I am going to look at the drive in a hex editor which will show the bits on the drive, the actual data and more than the picture in the file explorer.

Start off with files like this here
Under a Microscope (Hex Editor)
And another …
And a third …

Now, we see we have files and data, so now comes DiskPart and use the clean command, and see what we have left in the same spots as before …

First spot, still stuff …
Second position … still here …
Third position … yep, there is still stuff here too …

So, even after ‘cleaning’ the drive the bits are still present, which means that even though we do not see files when we look at the drive in Explorer, they can be put together some way. Now for giggles, we know that if we create a partition now on this “empty” drive there will be no files … but will the data still exist that could be recovered? Again, we DiskPart and this time run the commands to Create Partition Primary.

This looks just a little bit different …
This one looks really similar …
… and so does this one …

From the looks of it, part of the data looks different – meaning the files are “missing”, but the actual bits of the data are still left behind. This means that the bits could be recovered and the files put back together … not a great cleaning method. Maybe there is another way the drive could REALLY be cleaned …

Looking at the drive in explorer there are files present. I will still skip going into the highly technical part where ‘files in explorer we see are pointers to the actually data” in favor of “deleting the picture does not make the file disappear completely. To prove that the files are not actually removed, I am going to look at the drive in a hex editor which will show the bits on the drive, the actual data and more than the picture in the file explorer.

Start off with files like this here
Under a Microscope (Hex Editor)
And another …
And a third …

Now, we see we have files and data, so now comes DiskPart and use the cleanall command, and see what we have left in the same spots as before …

This looks a little different …
Whoa, nothing here …
Nothing here either …

Judging by the fact that there is a whole lot of zeros there, the drive is clean and data irretrievable, so if I did want to save something off there … I cannot anymore. For now, this wraps up my ranting about DiskPart and how it can clean up files you do not want people to find. I wanted to look at this myself for a while, and hopefully it helped out and now second-hand drives will be clean from now on.

Unraid the NAS

A few years ago I was looking for a new backup solution as I had outgrown the dual drive network storage I was using and since said drive network storage had also just failed. That is when I found some videos on Unraid and made the jump. … This post has taken me way too long to write. I think I started off planning to write a long thesis on Unraid, but Unraid is actually pretty straightforward and does exactly what it says on the package – build a storage server out of more or less anything.

I have been using Unraid for some time now, I started off with a Dell PowerEdge T20 and filled it up with as many drives as I could. That worked very well for some time (a good year or 2) until I found I had more drives than the little server chassis would hold, so I upgraded to a consumer Asrock board and a low end consumer AMD processor. The upgrade was as simple as moving the data and USB drives from the Dell chassis to the case with the Asrock board and then reconnecting and powering up the whole lot again. All the drives and storage were recognized and nothing was lost especially since I had mismatched hard drive sizes – a cool feature for Unraid, not all the drives of the storage array have to be the same size.

One would think consumer hardware would not be good for a 24/7 storage server but it turned out to be super stable, until I ignored a failed drive … and had a second drive fail. If the storage had been configured as a RAID 5, or something along those lines the array would have been lost along with the data, however this did not happen. The loss of 2 drives definitely put the whole data set down until they were replaced, but not all the data was lost – only what was stored on those 2 failed drives, the data on the rest of the array was safe and came back when fresh drives were put in.

Since that time I added extra parity drives to handle multiple drive failures, swapped out the consumer motherboard for server board and Xeon CPUs, and even expanded the array with larger drives with no major failures to report. The server runs as my backup and network data storage, Plex server, NFS ISO storage for virtualization servers among other roles as needed without any noticeable headaches. There is some cost associated with Unraid, but I highly recommend it (not a paid shill) for the ease and flexibility of the software – one can start off with a less expensive license to get started and upgrade as more drives are needed – really handy and really useful.

Sega Thrift

The first dive in the thrifty series got into the goods and bads of some eBay finds, this time though, we have a find from a proper thrift store. I found this bit of gaming archeotechnology for only a few dollars but just the console alone – no cables. Being only a few bucks, and the shell looking to be in very decent condition, I picked it up.

One Sega Genesis II

First order of business, I ordered a set of generic power and AV cables for it and then set about testing the console. To be completely honest, I was not surprised to see that it powered up and was working almost without an issue the first time. Key word .. almost… The connector for the power adapter wiggled a bit more than it should have, meaning the board most likely had a few broken solder joints. So popping open the case and pulling the main board out …

Yep, there are broken joints here … can you see them?
241

Yep, broken solder joints … but easy to fix. The fix for broken solder joints would be just a quick reflow (that is heat up and make liquid) of the solder and the console would be good to go, but since the connector looked a little rough, I figured I would go ahead and just replace it. Only about 20 minutes worth of work to replace the power connector and only a few bucks for the console and parts, and another piece of old tech saved from the landfill.

This was a rather short story, and admittedly not very interesting, it is exciting to see old tech saved from the landfill with only a few dollars in parts and a little bit of work. Cannot wait to tell more stories like this.

PHP Code Snippets Powered By : XYZScripts.com