Keeping on from Part 3, I start the next drive in the stack. Well ok, this drive was another of the later ones that I recovered, and when I started it I quickly noticed some names that I would recognize from earlier drives that will be getting posted later this week.
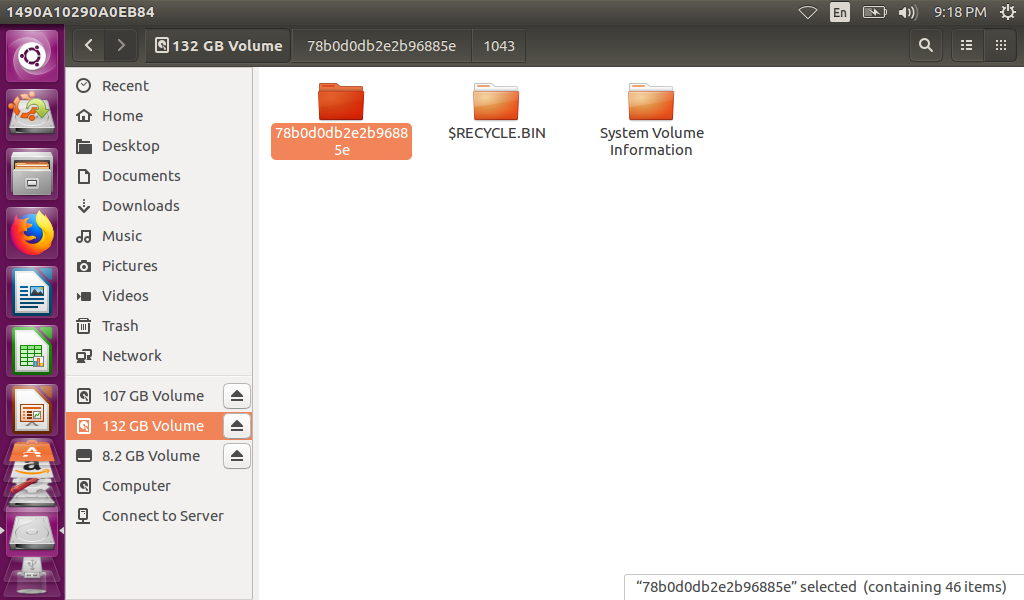
Clearly there are files to be seen herea lot of recovered folders too Clearly another full Operating System drive complete with Windows and User foldersWith more than 1 user or better stated there were several service level accounts in the user folder (I did not redact the postgres behind on purpose)
I stop with any screenshots here because I recognize one of the user names from other drives that are coming up later, as I mentioned earlier. This drive is just a toe into the pool of WTF that is coming up.
Pictures of women used for some kind of personal ad (the image has a phone number on it)
Head shots that appear to be multiple people from social media
Continuing from Part 2, I cringe and recover the next drive in the stack, against just looking to recover files from the drive…
Yep, more stuff left behind …It looks like there was a lot … … a full hard drive worth …
This was a hard drive that definitely came from a Dell computer, judging by the “Dell” folder that was full of drivers. Plus it was Windows 10, and had at least 1 feature update – OR was upgraded from Windows 7 as shown by the $Windows.bt folder.
Single user, name redactedSome music left behindbut a whole mess of family pictures left behind, also redacted
This was one of the later drives that I actually ran across and it looks like it was from the family laptop that only got turned on once in a while. There were no document or anything else major of note, and I skipped applying any sort of Forensics against it because at this point – I was just happy to see a machine that looked at least part way clean.
2 down, 4 to go. Onward to .. something… Tomorrow!
After the last Tales of eBay I got to thinking, I wonder if I can find other drives that were not cleaned … Or … better put how MANY I can find. So off to eBay I went to buy more drives than I needed to answer this question, because I put bids on auctions not expecting to win .. and did. I set out on this adventure with a total of 23 drives and a goal to see IF I could recover anything from an erased drive sold on eBay. Then the scope crept a bit to include NTFS Recover and Forensics practice. Then the scope crept more to include pairing up similar drives to attempt to swap platters (in the future).
After way too long of letting tools run, I decided after a few hundred thousand files, that I had enough material to answer my original question. In retrospect, this project took way too long and got way too complicated for a casual experiment. I settled on 6 drives out of the batch and will be putting out a post on each one to make a full week of posts on this (sloppy) Adventure in Data Recovery.
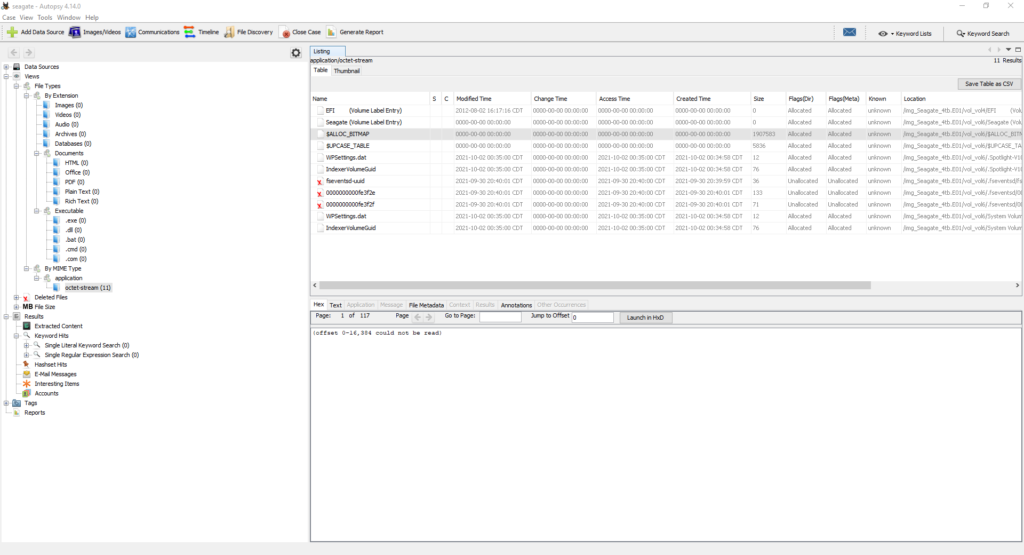
I start with the drive where I remembered to snag the screenshots from the searches with NTFS Recovery before it processed the files for recovery.
Selecting All the Files to recover… and we are off to the races Time to recover and see what is there The last folder is just all the loose files, the other 2 are the structure as it was on the drive… and as expected, there is stuff not removed.
My point of this exercise is not to call out SPECIFIC data but just to say that things were not removed like they should have been. However just a little bit of what did not get removed included
Passwords
Hardware Manuals, Training docs
Emails
Encrypted Zip files
So, first drive into the batch and I have already found things and am disappointed. 1 down, 5 to go. Onward tomorrow with the next drive.
I was recently in the market for a pair of 4 TB hard drives for a duo of USB enclosures that I had picked up a few years ago. So not wanting to spend retail prices I hoped onto eBay and grabbed up a pair for a deal. Few days later the drives arrived in the mail and found their way into the enclosures. So I plug the first drive into my desktop to format it …
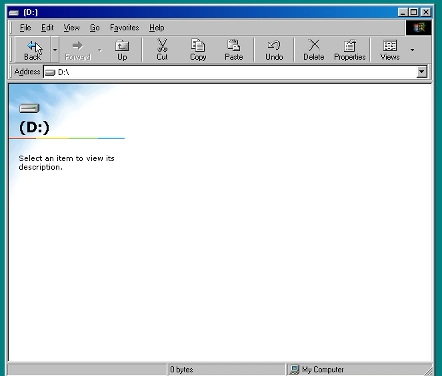
… the drive is formatted and named. I was expecting to see a RAW drive, not a partitioned drive. Does that mean that I got a drive with data on it? Ugh…
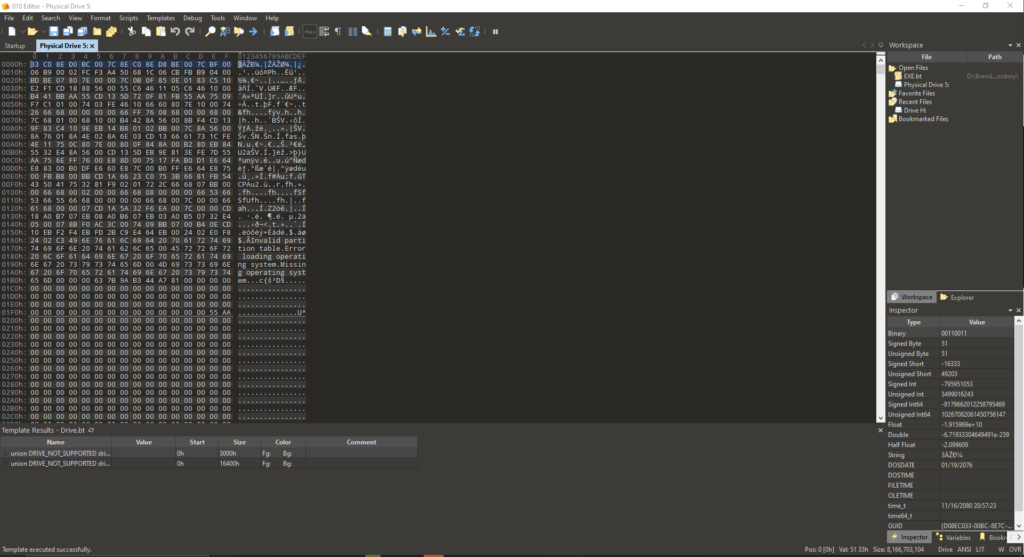
So fire up 010 Hex Editor and lets take a look at the raw bits. The first page has data, which makes sense since there is a partition on the drive…
Ugh … There IS something on this drive …
Well … something is the word. Applying some digital forensics to the drive (because why gratuitous use of forensic tools), the tools show a structure that looks like a drive with data.
I could use some forensic type tools to carve whatever data might be on here, but I really want to try a new (to me) commercial tool and see if it can recover data from a formatted drive. So I fire up Disk Internals NTFS Recovery, point it at the drive, and tell it to search for the popular files. Let me be clear at this point, this attempt is going to be sloppy, I am aiming to recover ANYTHING, just to get some practice with this tool.
NTFS Recover seems to have found something? Does not look like anything too interesting, just an Outlook archive file. So, I tell the software to recover the file …
Turns out … the recovered file IS an Outlook archive file. No way I am connected that to my outlook to see what is in it – I do not need to know, more over, I could care less what is in the file. I would like to ask WHY can I find anything on a 2nd hand drive … and now … are there more out there?
Stay tuned, I start answering that question tomorrow.
“New Phone, Who Dis?” famous words said countless times to any number of people days, weeks, and even months after replacing a mobile phone. The strange “Who Dis?” dance goes on when we get a new computer too, though the moves are a little different. Worse, the steps of the dance especially when the computer is not exactly Brand New and the previous owner left their grubby fingerprints all over.
I have had some luck in the past 18 months or so finding really interesting computers at thrift stores and in ‘lots’ of “junk” computers from various online sellers. One of these so-called “junk” laptops happened to be this little Asus EEE PC pictured below. By today’s standards, the EEE PC no where NEAR anything to write home about, but back in the day this little brick was a pioneer, kicking off the ‘Netbook’ style of computers (outside Japan).
Of course, when the machine arrived the battery was completely drained and there was no power supply included – but a quick once over and the machine looked to be in working order. A power supply was quickly sourced and once power was applied, the laptop bounced back to life, and started Windows.
Awesome, already loaded with Windows 7. Since this machine was part of a lot of machines I really did not need anyway, seeing this I am about ready to get this little laptop ready to throw onto eBay. Until …
Oh. Well. A password prompt, lovely. It is at this moment of our story that I need to make a point or three. First, the powers I am about to demonstrate can be used for good or evil, and while this really is not a sophisticated trick – Do. No. Evil. with what you may learn. Second, I feel comfortable sharing these screen shots as there honestly not enough information here to identify the previous owner OR anything personally identifiable (aside from a name and a few internet favorites, random files, et cetera). Third, the point I am aiming for is that – before you donate a computer to your local charity, erase your stuff…
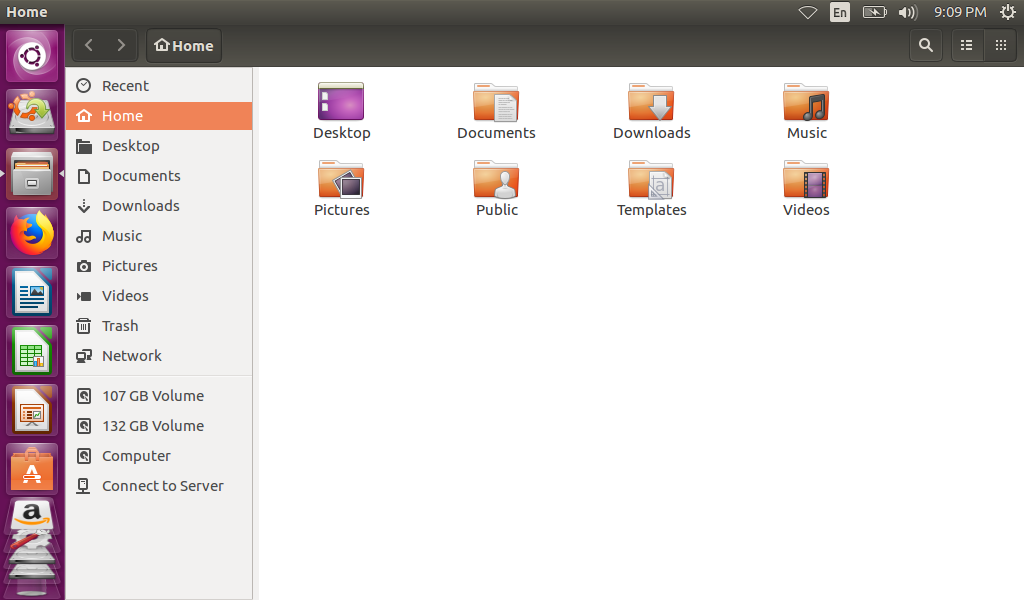
Now, seeing a password prompt I can easily just erase the drive and reuse the computer, but I simply cannot pass up the opportunity to see what a computer was used for in a past life. Cracking the password just is not worth the time as the machine is now mine and seeing Windows 7 Starter is installed, it is not encrypted. At this point, I reach for a trusty USB drive with a Live Ubuntu image and booted right up to the drive, and I am around the password.
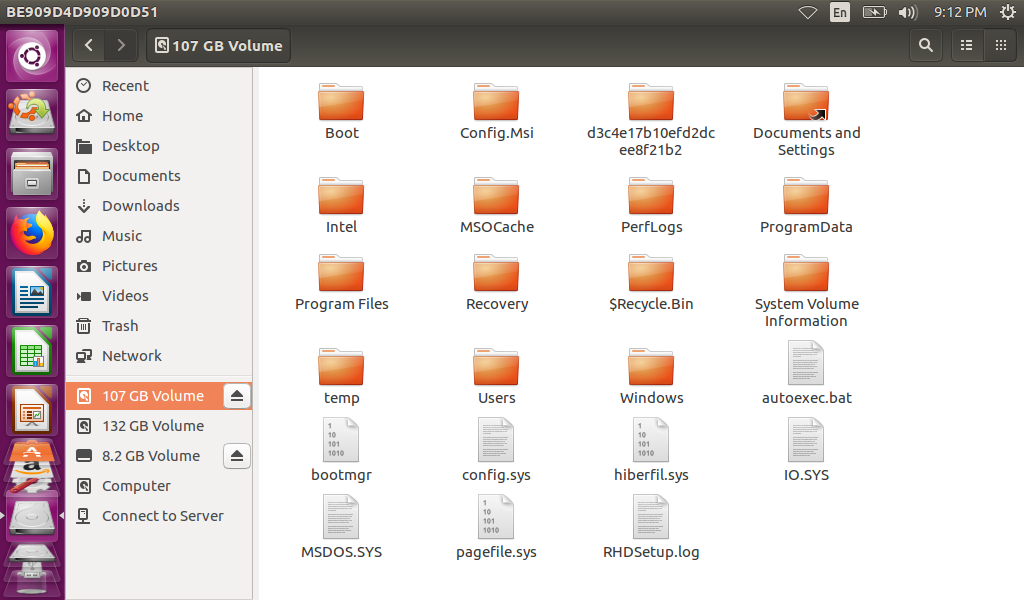
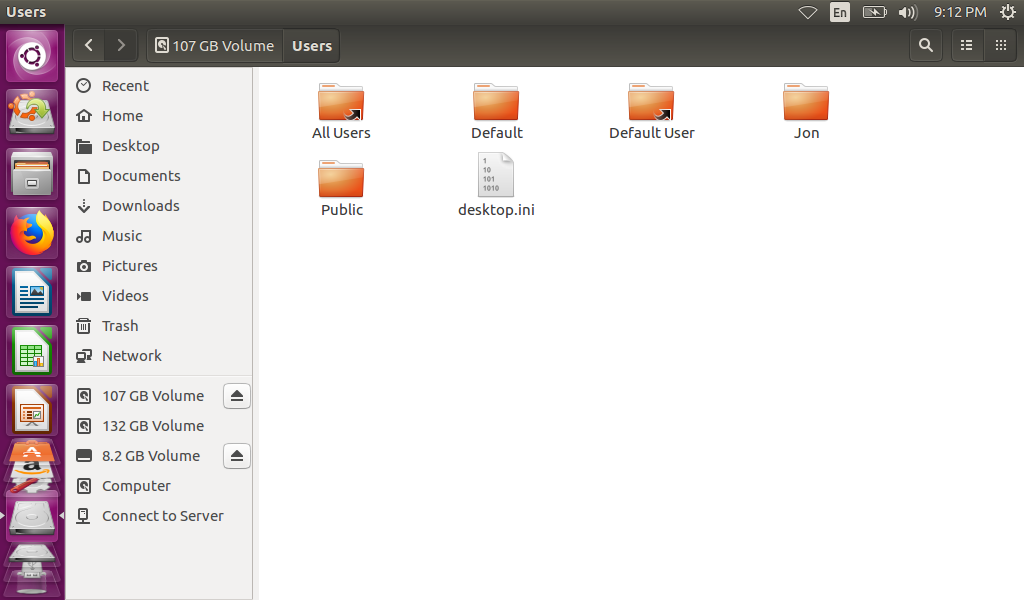
Now with the password problem sorted, time to check the hard drive. The first observation is that this drive was spilt into 2 volumes (something like an OS partition and a Data partition). Starting with the partition with Windows on it, the folder layout on the drive drive looks very much like a Windows 7 Installation would. This means that if there is anything obvious to be found, the Users folder is where to begin.
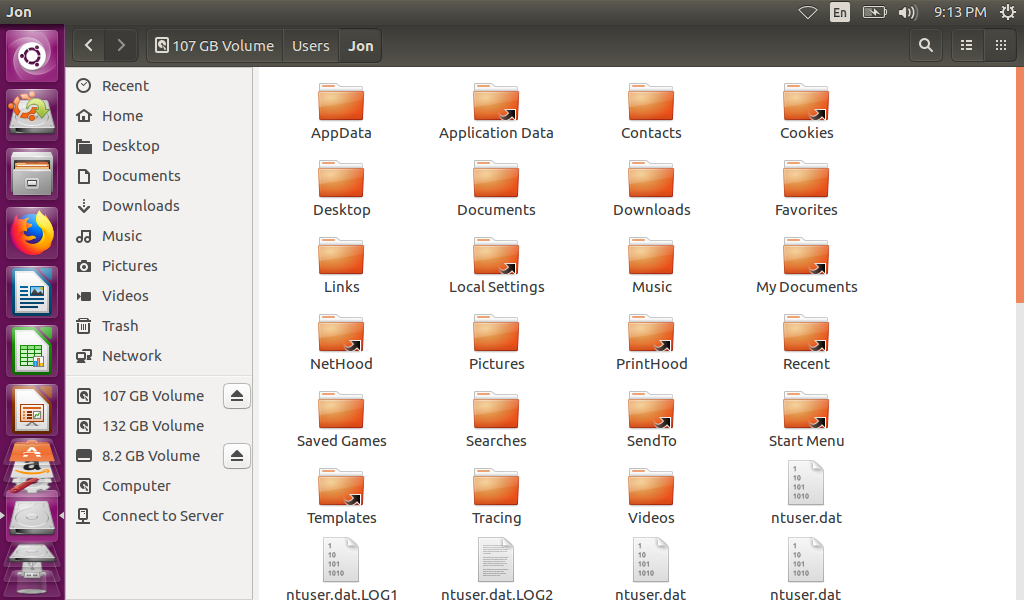
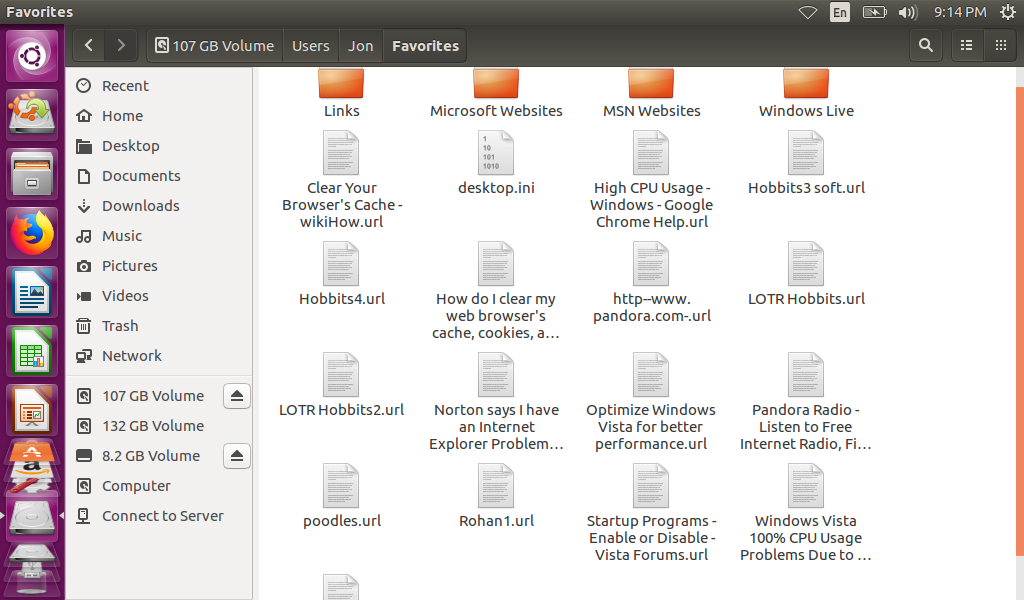
With just a few clicks we find ourselves in the previous owner’s user profile (Jon) and can now see what was left behind, aside from a password that is.
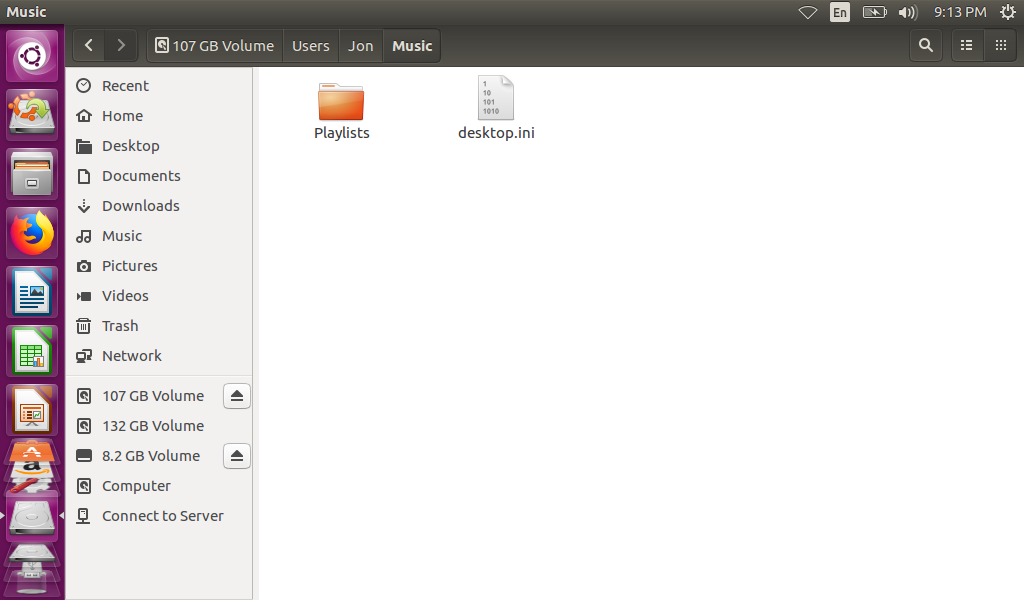
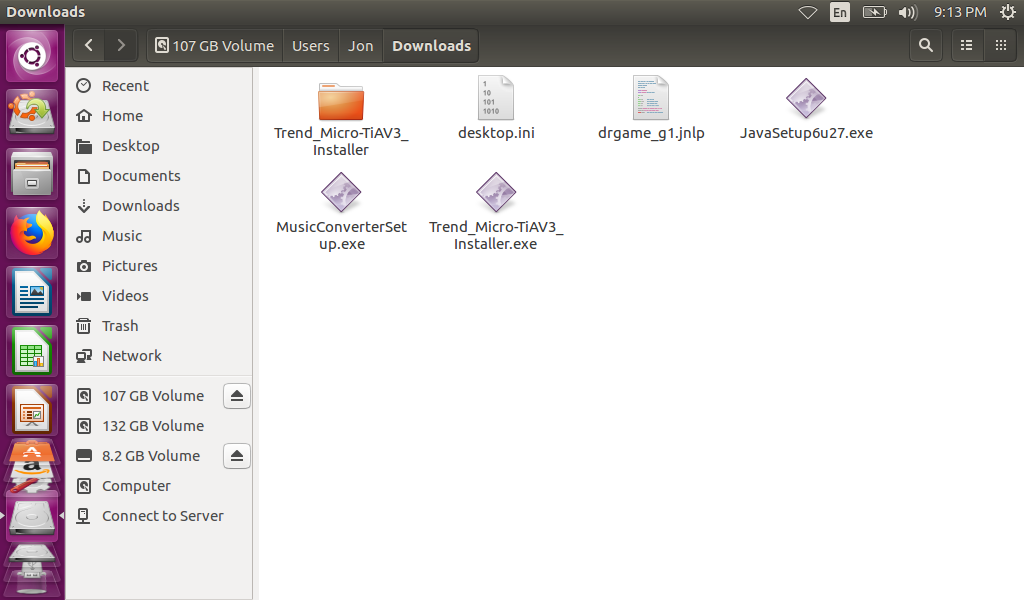
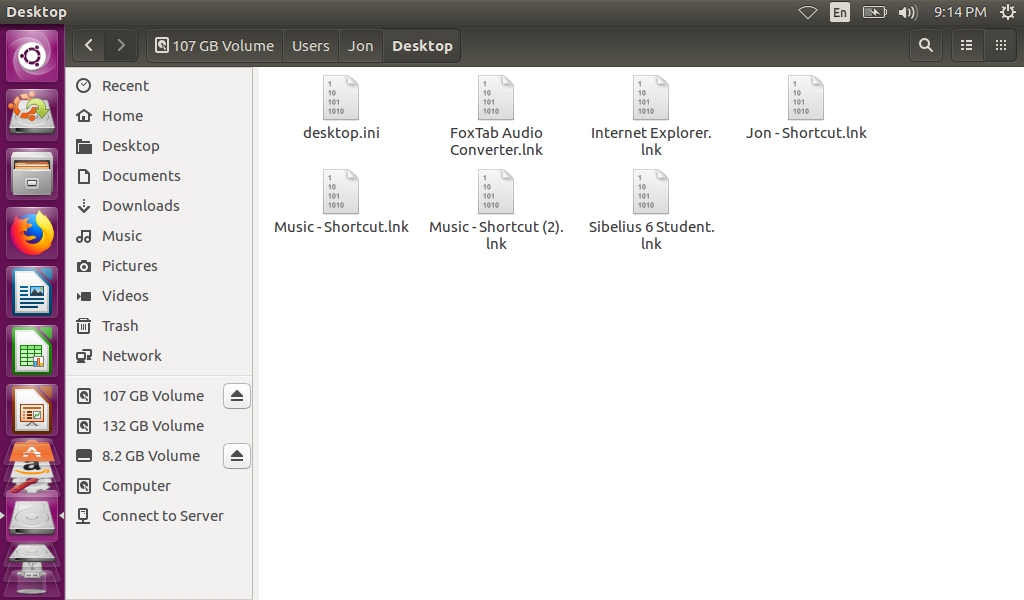
Not much music to listen to …At least it has virus protection, or well there was an attempt … Someone was saving some links to fix their computers …Lots of audio shortcuts on the desktop …But no pictures to speak of … Onto the second partition … and not much here either (just Windows created folders) …
There was not much to speak of on this machine, only a few bit and crumbs left behind. Although, the more technical readers will be quick to point out that I did not look for internet cookies, internet cache, or temporary files and they would be correct. Finding all the crumbs to build a profile on a particular user was not the point of this exercise … The point of this exercise was to point out how simple it was to get the data off the machine even though a password was in place. No fancy or complicated tricks were used, just a bit of time and patience and then I could see anything left behind.
Of course I should not have to say this again, but this was a machine I purchased second hand from a thrift store and the drive was securely wiped after writing this. A method like this should not be used to bypass any sort of security on devices that you do not own … and, in conclusion, for the love of all that is holy … Erase your stuff BEFORE selling or donating them!
“What is the Dos utility that allow you to partition a hard drive?” Without a doubt, this one question kept me from getting a job with the Geek Squad back when it rolled into the Best Buy stores. Looking back, yeah, I still do not feel bad about not getting that job.
I do have a twinge of remorse though from a short time back while I was working on some retro machines. I had some smallish, older hard drives (around 120gig) drives that I decided would work as portable drives for moving files to and from old machines (Windows 98). I was quickly reminded only after moving the drives to enclosures, that Windows 10 cannot format volumes over 30GB with FAT32. Thanks Microsoft. Now, there are 3rd party tools that can do this but I knew it was possible without them.
I plugged the drives into the Windows 98 machine and … did not get much farther. Well, since the tools in today’s Windows cannot do the job, time to break out the time machine and go back in time to dust off those dos tools and break out fdisk.
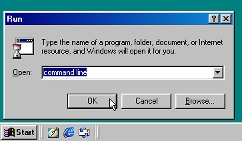
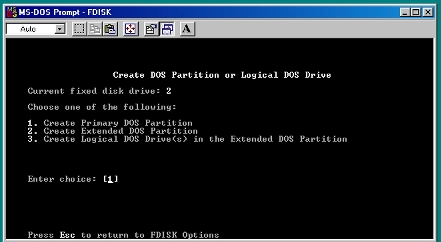
First, we need a command line as fdisk is a dos utility and does not have a graphical interface (unlike disk management in Windows 10). A bit of Start run magic …
“Command Line”
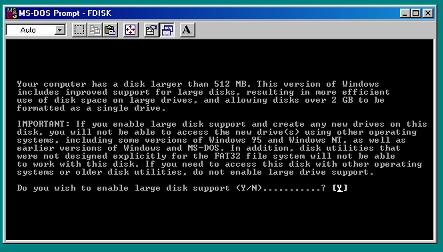
Entering in fdisk in the command prompt gets into the program and the first question to answer
Enable large disk support?
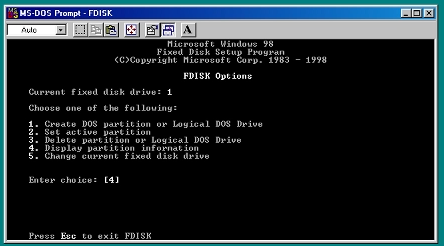
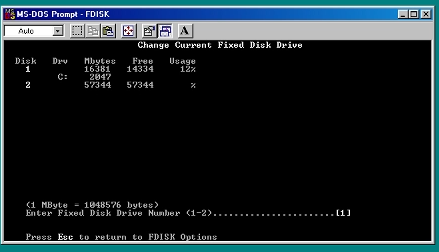
Large disk support turned on and at the main menu. Before going much further, let us check the current partitioning and switch to the drive we need to work on
Display partitions
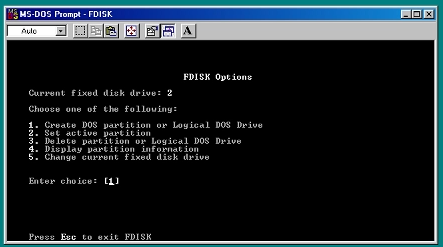
Change drive
New drive selected, no current partitions on it … Perfect! Time to create a new partition then.
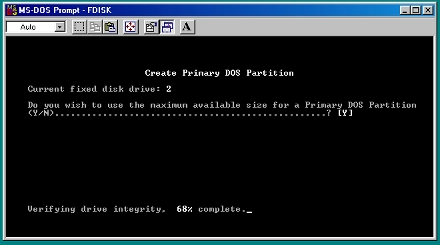
Create DOS partition …
… and make it a primary …
… and use the whole drive.
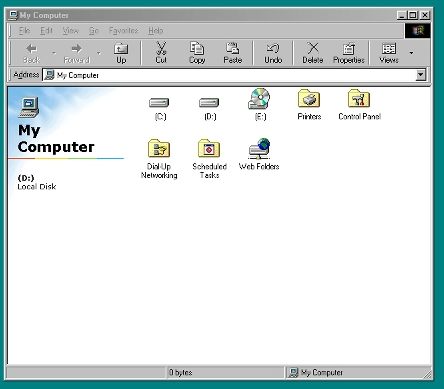
We have a primary partition the size of the second hard drive, but we are not able to put any files on the drive yet since it is not formatted yet. Unlike preparing a drive on a system today, Windows 98 and earlier required the machine to be restarted to pick up the new partitions / drives. Then once rebooted …
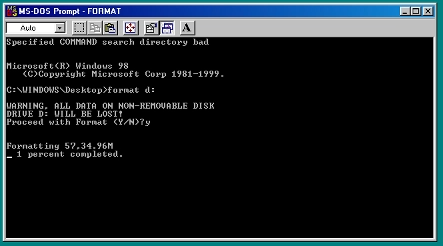
A Second Hard Drive!!one quick format …formatted hard drive
Behold, a formatted hard drive! Of course there are a lot more things fdisk can do, but those are beyond what I needed right now, which was to add that second hard drive to use to store stuff. Now that the second drive is created and blank, time to put things on it.
A few years ago I was looking for a new backup solution as I had outgrown the dual drive network storage I was using and since said drive network storage had also just failed. That is when I found some videos on Unraid and made the jump. … This post has taken me way too long to write. I think I started off planning to write a long thesis on Unraid, but Unraid is actually pretty straightforward and does exactly what it says on the package – build a storage server out of more or less anything.
I have been using Unraid for some time now, I started off with a Dell PowerEdge T20 and filled it up with as many drives as I could. That worked very well for some time (a good year or 2) until I found I had more drives than the little server chassis would hold, so I upgraded to a consumer Asrock board and a low end consumer AMD processor. The upgrade was as simple as moving the data and USB drives from the Dell chassis to the case with the Asrock board and then reconnecting and powering up the whole lot again. All the drives and storage were recognized and nothing was lost especially since I had mismatched hard drive sizes – a cool feature for Unraid, not all the drives of the storage array have to be the same size.
One would think consumer hardware would not be good for a 24/7 storage server but it turned out to be super stable, until I ignored a failed drive … and had a second drive fail. If the storage had been configured as a RAID 5, or something along those lines the array would have been lost along with the data, however this did not happen. The loss of 2 drives definitely put the whole data set down until they were replaced, but not all the data was lost – only what was stored on those 2 failed drives, the data on the rest of the array was safe and came back when fresh drives were put in.
Since that time I added extra parity drives to handle multiple drive failures, swapped out the consumer motherboard for server board and Xeon CPUs, and even expanded the array with larger drives with no major failures to report. The server runs as my backup and network data storage, Plex server, NFS ISO storage for virtualization servers among other roles as needed without any noticeable headaches. There is some cost associated with Unraid, but I highly recommend it (not a paid shill) for the ease and flexibility of the software – one can start off with a less expensive license to get started and upgrade as more drives are needed – really handy and really useful.
As we know, Windows 11 came out with some serious system requirements… requirements that a lot of family computers just do not have the resources for meaning a lot of new computers will be bought in the next few years, or does it? The fact is that it may still be the case that new computer will need to be purchased, but maybe there is a way to squeeze a little bit more life out of that old computer and still try Windows 11.
To be honest I really expected this to be a lot more difficult, but it turns out that there are a huge number of ways to bypass the system requirement check. Posts from XDA Developer and Make Use Of have mostly the same methods, except for probably the easiest method, found on the Make Use Of site – simply copy over the install ESD from 11 to 10.
To complete this I built 2 USB drives using the media creation tool for Windows 10 to create one USB drive and the creation tool for Windows 11 to create a second USB with Windows 11; using a larger 16GB drive for the Windows 10 more about that here in a minute. The tools take a few minutes to build out the drives and when complete you have a USB drive for installing Windows 11 and a second for Windows 10. Just to be see what the failure looks like, boot up to the Windows 11 drive …
Can’t run Windows 11
Now we know what message comes out when the hardware is not Windows 11 compatible, time for the last step in this process. Copy the install.esd file from the sources folder of the Windows 11 USB and copy to the sources folder of the Windows 10 USB.
Install.esd
In the above I renamed the original ESD file before copying the Windows 11 one over – just as a precaution, but you can just as easily replace the one on the Windows 10 drive with the one from the Windows 11 drive. From there, just boot up to the Windows 10 drive with the Windows 11 ESD and proceed with install.
Installing normally
The Windows 10 installer puts down the Windows 11 bits and configures without any other warnings or error (at least from the Windows perspective). Once the installer finishes (if there were no other errors) the machine will be left on the Windows 11 OOBE (Out Of Box Experience) screen just waiting for someone to log in!
So I had a thought the other day, back when the Windows 10 launched, Microsoft allowed users with Windows 7 to upgrade their computers to Windows 10 without having to pay for an upgrade. Supposedly this upgrade ability was turned off, but has it? I have a Windows 7 laptop let us find out …
Take a Windows 7 Home machine The upgrade process is launched from a Windows 10 USB install instead of a downloaded installPerforming checks …Getting things ready is a good sign …Accepting the terms and conditionsAm I ready to install? Yes…Confirming the settings and what to migrate.
At this point of the process I am convinced that if the upgrade engine were to bail out because the upgrade to 10 was no longer supported, it would have done it by now.
Out with the Windows 7 and in with the Windows 10 …Windows 10, upgraded and activated…
So the answer is yes, the upgrade process does still work despite the fact that Windows 11 has become a thing and being actively pushed out by Microsoft. I have updated several laptops in the last year or so and it has worked well every time, safe to say … the upgrade process has not been disabled.
Building onto Parting the Disk we can see how DiskPart might be applied to clean up drives BEFORE selling or throwing away a machine. I did not have a machine convenient to test the cleaning of drives, but I DID have a Windows 10 Install USB, so that will have to do for the purposes of this test…
First, looking at the drive in explorer there are files present. I am going to skip the highly technical part where ‘files in explorer we see are pointers to the actually data” in favor of “deleting the picture does not make the file disappear completely. To prove that the files are not actually removed, I am going to look at the drive in a hex editor which will show the bits on the drive, the actual data and more than the picture in the file explorer.
Start off with files like this hereUnder a Microscope (Hex Editor)And another …And a third …
Now, we see we have files and data, so now comes DiskPart and use the clean command, and see what we have left in the same spots as before …
First spot, still stuff …Second position … still here …Third position … yep, there is still stuff here too …
So, even after ‘cleaning’ the drive the bits are still present, which means that even though we do not see files when we look at the drive in Explorer, they can be put together some way. Now for giggles, we know that if we create a partition now on this “empty” drive there will be no files … but will the data still exist that could be recovered? Again, we DiskPart and this time run the commands to Create Partition Primary.
This looks just a little bit different …This one looks really similar …… and so does this one …
From the looks of it, part of the data looks different – meaning the files are “missing”, but the actual bits of the data are still left behind. This means that the bits could be recovered and the files put back together … not a great cleaning method. Maybe there is another way the drive could REALLY be cleaned …
Looking at the drive in explorer there are files present. I will still skip going into the highly technical part where ‘files in explorer we see are pointers to the actually data” in favor of “deleting the picture does not make the file disappear completely. To prove that the files are not actually removed, I am going to look at the drive in a hex editor which will show the bits on the drive, the actual data and more than the picture in the file explorer.
Start off with files like this hereUnder a Microscope (Hex Editor)And another …And a third …
Now, we see we have files and data, so now comes DiskPart and use the cleanall command, and see what we have left in the same spots as before …
This looks a little different …Whoa, nothing here …Nothing here either …
Judging by the fact that there is a whole lot of zeros there, the drive is clean and data irretrievable, so if I did want to save something off there … I cannot anymore. For now, this wraps up my ranting about DiskPart and how it can clean up files you do not want people to find. I wanted to look at this myself for a while, and hopefully it helped out and now second-hand drives will be clean from now on.